
Before
After
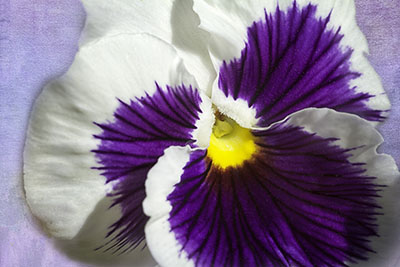
Pansies are one of my favorite flowers. While I like to try to fill the frame in my flower images it is a little hard to do with a pansy without losing something important. It seems that adding textured backgrounds to flower images is all the rage these days so I thought I would give it a try. First I took the image into Nik Color Efex Pro and brightened it up and added detail. Then back in Photoshop I took one of my recently purchased French Kiss textures and adjusted the color to fit my image using a Hue/Saturation slider. I think I took the saturation down a little too for a more subtle look. I sometime also add a Gaussian blur when I just want color in the background but no texture…can’t remember if I did on this one. Once the texture looked right for the background I brought it into the pansy image as a layer. Then I cycled through the blend modes until I found a look I liked. Finally, I added a layer mask and masked out the texture area overlapping the flower. In this case the blend mode brought back some of the yellow flower in the lower left so I used content aware fill to get rid of it. And voila, a nice flower portrait with an uncluttered background.